
Insights / Technical notes
Updating a Running Ubuntu Server: Preparation, Connection Recovery, and Post-Reboot Checks
Using the migration from Ubuntu 24.04 to 26.04 and routine updates as examples, this article explains in concrete terms how to test an actual backup restore, preserve configuration, decide when services can stop with no active users, troubleshoot SSH that does not return, and define completion criteria.
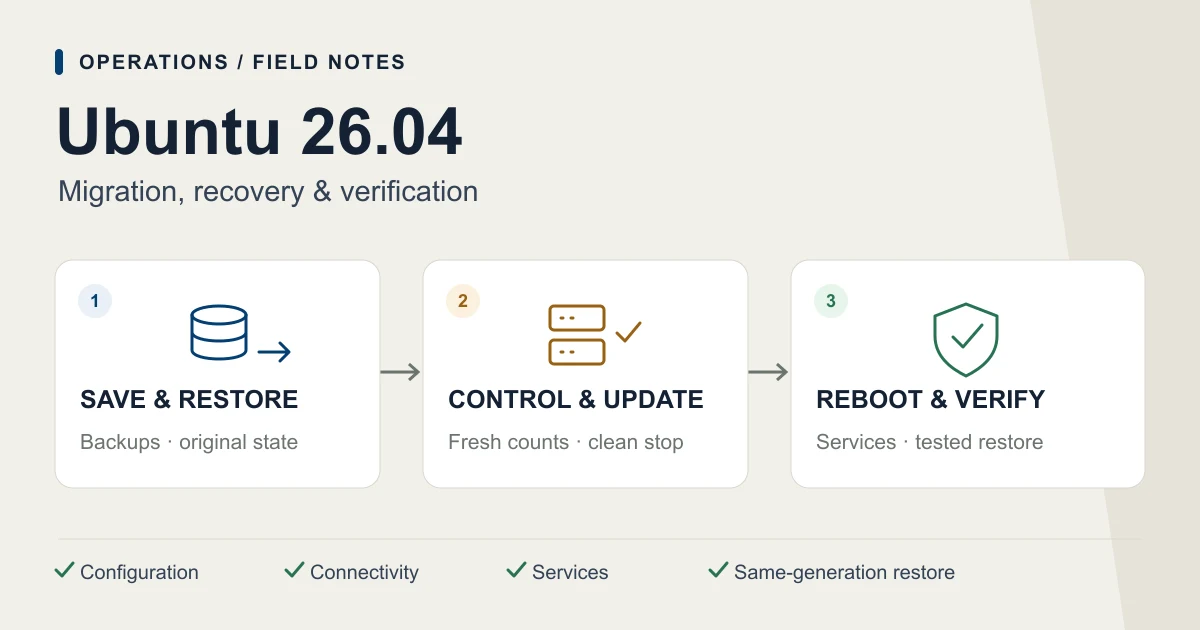
Table of contents
- Choose a 24.04-to-26.04 upgrade or ordinary updates
- 1. Determine the update type and scope
- 2. Ensure you can operate the server even if SSH disconnects
- 3. Restore a backup to a separate location
- 4. Preserve the original running state, not just the configuration
- 5. Turn a period with no users into a safe stop condition
- Distinguish a graceful-shutdown request from successful completion
- 6. Separate index retrieval, plan review, and application for routine updates
- Handling updates held back by phased rollouts
- 7. If SSH does not return, check connectivity and startup in order
- When cloud-init regenerates network configuration
- 8. Check authentication and startup compatibility only for relevant configurations
- If Samba provides Windows domain authentication
- If SSSD connects to an external authentication system
- If an update is interrupted and packages or boot files are incomplete
- 9. Compare the completion criteria after reboot
When updating an Ubuntu server that is already in service, the work involves more than installing newer packages: you also need a procedure for stopping services and returning the server to operation after reboot. Problems such as SSH becoming unreachable, authentication settings no longer matching the new behavior, or being unable to retrieve a backup can occur even after the update command completes.
This article organizes lessons from an LTS upgrade from Ubuntu 24.04 to 26.04 and routine updates after the upgrade into procedures that can be applied to other servers. It assumes you have administrative privileges and can schedule a maintenance window that includes service downtime. First, it presents the common preparations and procedure; the second half covers troubleshooting connectivity, authentication, and startup problems.
Choose a 24.04-to-26.04 upgrade or ordinary updates
Decide whether you need a new OS generation or only fixes for the current one. A release upgrade adds compatibility checks for external authentication, VPN, and databases; ordinary updates focus on planned package changes and restart impact. Set a stop condition if console recovery or tested restoration is unavailable.
Ubuntu Server:LTS upgrade conditions and preparation
1. Determine the update type and scope
First decide whether you are changing OS releases or updating packages within the same release. The amount of change required and the checks differ.
| Task | Example | Tool | What to check beforehand |
|---|---|---|---|
| Routine update | Fixes and kernel updates within Ubuntu 26.04 | APT | Planned updates, additions, and removals; effects of service restarts |
| Release upgrade | Migration from Ubuntu 24.04 to 26.04 | do-release-upgrade |
Official upgrade requirements, compatibility, deprecated or split packages |
apt-get dist-upgrade is a command that resolves dependencies for the configured package sources. Despite the word “dist” in its name, it is not a dedicated command for upgrading to the next Ubuntu LTS release. Perform a release upgrade following Ubuntu’s official procedure. In production, do not use the development-release -d option or manually rewrite only the APT sources. Changing from Debian to Ubuntu is also not covered by this upgrade procedure.
Check not only the target host but also the DNS, authentication, database, and access VPN on which it depends. If you are updating several servers, proceed with 1 server at a time, confirming that dependent services are stable. If this overlaps with other maintenance or backup tasks, determine the order first.
Also decide in advance on stop conditions, such as “restore fails,” “a required package cannot be retrieved,” “the service cannot be stopped cleanly,” or “the recovery console is inaccessible.” It is easier to make decisions if you reserve time for recovery first, rather than continuing the upgrade until the maintenance window ends.
2. Ensure you can operate the server even if SSH disconnects
Before updating, verify that you can reach the recovery console from the VPS or cloud management portal. Do more than open the console: make sure you have a login method that lets you operate the OS. An access path that depends on the same VPN or authentication server as SSH will not help if that dependency goes down.
A reboot button may fix a temporary hang or malfunction. Configuration errors and startup-order problems will recur after reboot. Before repeatedly rebooting a system whose update status is uncertain, make sure you can inspect its current state from the console.
If you use a provider’s disk image, find out whether booting or operating the server is restricted while the image is being created, how long it is expected to take, and what storage limits and billing units apply. If you use an application backup, you also need steps to rebuild the OS and restore the configuration. Whichever option you choose, write down beforehand what it covers and what it does not.
3. Restore a backup to a separate location
Even if a backup job succeeds, that does not guarantee it contains the necessary data or that the data can be read back. Before updating, restore a backup generation whose target host, save time, and contents you have verified into an empty test directory.
For example, if you use the backup tool restic, you can perform the following check from an administrator shell that can use the existing connection settings. Replace snapshot_id with the ID of the generation you inspected. Pinning the ID instead of relying on latest ensures the target does not change even if another backup runs during the test.
# 既存のリポジトリ接続設定を使う。秘密値をコマンドに直書きしない。
snapshot_id='確認したスナップショットID'
umask 077
restore_dir=$(mktemp -d /var/tmp/restore-check.XXXXXX) || exit 1
restic restore "$snapshot_id" --target "$restore_dir" --verify
Do not use the production data directory as the restore target. restic can overwrite existing files, so review the official restore documentation and perform the test in an isolated, empty location. A configuration example using object storage such as R2 is also covered in How to Include an Actual Backup Restore Test.
After restoring, check the following according to the data format.
| Data | What to check | What this alone cannot confirm |
|---|---|---|
| Archives such as ZIP | Extraction and integrity checks; required files exist | That the application starts and can use the data |
| SQL dump | Import into an isolated database; schema and key data | Consistency with attachments or external storage |
| SQLite | Restored file exists and has the expected size; DB integrity check | Recovery of the entire service |
| Settings, certificates, and keys | Target files, ownership, permissions, and references | Configuration or validity on external services |
Copying database files directly while the database is running can capture an inconsistent state. Use a backup method provided by the database or application that preserves consistency, and align the points in time for the data and related files. Some inspection commands may create a new, empty database, so verify that the restored file actually exists before reporting that the integrity check succeeded.
If you start an identity system or similar service for testing, isolate its network so a duplicate with the same identifiers cannot communicate with production. If you use containers or namespaces, verify that they are isolated before mounting files or starting services. Also check that the process for preparing a test /run does not mask the production host’s /run.
4. Preserve the original running state, not just the configuration
Along with copies of configuration files, record the following. Keep the backup location accessible only to administrators, and separate records by task so existing ones are not overwritten.
| What to record | What to compare later |
|---|---|
| OS and packages | Release, running kernel, installed packages, APT sources and holds |
| Network and SSH | Netplan, SSH settings, VPN settings, firewall management method |
| Services | Units and drop-ins, enabled or disabled at startup, current state |
| Scheduled tasks | Timer, cron, and backup enabled or disabled state and next run |
| Applications | Configuration, data locations, container setup, external dependencies |
Here is an example of preserving state on Ubuntu using Netplan and systemd. Confirm that the target directories exist, then run it from a root shell after entering one with sudo -i. The directory created by mktemp is a new location accessible only to root, so it does not overwrite previous records.
umask 077
record_dir=$(mktemp -d /root/ubuntu-upgrade.XXXXXX) || exit 1
cp -a /etc/netplan /etc/ssh /etc/systemd/system "$record_dir/" || exit 1
apt-mark showhold > "$record_dir/apt-hold.txt"
systemctl list-unit-files > "$record_dir/unit-files.txt"
systemctl list-units --type=service --all > "$record_dir/services.txt"
systemctl list-timers --all > "$record_dir/timers.txt"
cat /proc/sys/kernel/random/boot_id > "$record_dir/boot-id.txt"
This example does not include application-specific settings or data on external storage. Add the targets identified in the table above and record the backup location in the work log.
Here are some example commands for checking state. Output containing the hostname, connection endpoints, or configuration details should not be published; keep it with the work records.
cat /etc/os-release
uname -r
cat /proc/sys/kernel/random/boot_id
apt-mark showhold
systemctl list-timers --all
systemctl --failed
sudo sshd -t
sshd -t checks SSH configuration syntax. A successful result does not prove that the server is reachable from outside. Check Netplan syntax and generated configuration separately from actual network connectivity as well.
If you stop timers or temporarily change holds for the update, record their original state and the reason. Unconditionally enabling “everything” afterward can restart tasks that were intentionally stopped. When restoring configuration, do not replace all of /etc with an old state; compare only the changes made for this task.
5. Turn a period with no users into a safe stop condition
For services that should be stopped only when nobody is using them, check the observation scope and timestamps in addition to confirming that the number of users or connections is 0. Looking only at the front-end proxy does not guarantee that backend servers or running jobs are idle.
First, list all targets used for the decision and retrieve the latest value from every target. If retrieval fails, data is missing or stale, or a server is outside the monitoring scope, do not allow the stop. Converting “no value” to 0 can cause a shutdown when monitoring fails.
For example, if monitoring normally updates every few seconds, you could set a condition that both the observation timestamp and the source-data update timestamp are no more than 15 seconds old. 15 seconds is only a design example; choose a value based on the actual update interval and check for clock skew too. If a user count alone is enough to make the decision, there is no need to collect usernames or periodically send a list command to the console.
Just before stopping, follow this sequence.
- Confirm that the user or process count is 0 for every target and that no conflicting maintenance task is running.
- Close new requests at the application or load balancer. Use a method that lets existing work finish gracefully.
- After closing requests, use newly generated values to confirm again that all targets are at 0.
- Request a graceful shutdown and verify that the process has exited and data has been saved.
- Restore request handling only after post-update and post-reboot checks are complete.
If a user is found after request handling has been closed, do not proceed with the stop; use the preplanned wait or request-restoration procedure. Do not reuse the previous 0 value.
If using a firewall for control, check how new and existing connections are handled, along with IPv4 and IPv6, and TCP and UDP. UDP connection handling varies by application, so consider the application’s maintenance mode as well. Keep administrative SSH or VPN access and internal traffic available, and verify that request handling remains blocked during reboot. Use a dedicated temporary rule so that only that rule needs to be removed when service resumes.
Distinguish a graceful-shutdown request from successful completion
If you use systemctl stop, first check the target unit’s ExecStop, stop timeout, and forced-termination settings. If ExecStop only sends a termination request and returns, systemd may terminate the remaining process. Follow the systemd documentation and include a wait for graceful shutdown to finish.
For services stopped through console input, the correct command must reach the target process with a newline. Shell features such as $() or pipes are not necessarily available automatically in a unit’s command line. Put the required processing in a small script, with checks to avoid targeting the wrong process and a wait for it to exit. If the operation times out, investigate why the service cannot stop gracefully instead of force-killing it and continuing the update.
6. Separate index retrieval, plan review, and application for routine updates
Once restore verification and stop preparations are complete, retrieve the package indexes first. Do not proceed using stale indexes if any source failed to update.
# この段階ではパッケージを更新しない
sudo apt-get update -o APT::Update::Error-Mode=any &&
  sudo apt-get -s --no-remove dist-upgrade
Check the simulation’s exit status and the planned updates, additions, and removals. --no-remove is a condition that aborts if removals are required. Kernels and similar packages may require new packages to be added, so do not make “0 additions” a general requirement for routine updates. The APT documentation notes that the state during simulation is not fixed. Immediately before execution, verify that no other APT operation is running and check whether the plan has changed.
Once the plan is acceptable and the target services are confirmed stopped, apply the updates. The following is an example of displaying additional restart suggestions as a list in an environment that uses needrestart.
# 通常更新の予定を確認し、必要なサービスを正常停止した後に実行する
sudo env NEEDRESTART_MODE=l apt-get --no-remove dist-upgrade
NEEDRESTART_MODE=l specifies needrestart’s list display mode. It does not prohibit all service restarts triggered by package configuration scripts. Perform the update in a maintenance window with the recovery path secured, accounting for the impact on SSH and VPN access. Do not add -y without review or use an option that indiscriminately replaces all configuration files.
To prepare for an SSH disconnection, use an administrator session such as tmux that can continue running after the connection is lost, and record the command’s exit status. For automation, immediately before execution check the target host, OS release, configuration comparison, backup verification, and stopped state; save intermediate stages as well. Do not rerun the same update just because the connection was lost.
Handling updates held back by phased rollouts
Ubuntu phased updates gradually provide routine updates to a subset of users, and reduce or halt the rollout if problems occur. If a routine update leaves packages held back by phased updates, record the reason. You do not need to force installation solely to reduce the number of held packages to 0. Ubuntu’s explanation of phased updates
However, preparation for a release upgrade is different. Ubuntu’s official procedure instructs you to update the current release, including phased updates. Apply the official prerequisites current at the time before running do-release-upgrade. A release upgrade may require package replacements or removals, so do not reuse the routine-update command above unchanged as the migration procedure.
Before running the upgrade, use the following command to check which target release is offered.
sudo do-release-upgrade -cIf the intended LTS is offered, and updates and a reboot of the current release, restore verification, and compatibility checks are complete, run sudo do-release-upgrade during the maintenance window. If no target is offered during the check, investigate the availability requirements. Do not use a development-release option to proceed. If prompted to change configuration files, review the diff and assess the impact on connection and authentication settings.
7. If SSH does not return, check connectivity and startup in order
If SSH cannot connect, use the recovery console to check the following in sequence.
| Stage to check | Example checks | What to investigate next |
|---|---|---|
| Whether the OS has booted | Console, systemctl --failed |
Emergency mode, failed units, interrupted package configuration |
| Whether IP and routes exist | ip address, ip route |
Netplan source, interface name, route changes |
| Whether SSH is listening | sshd -t, SSH service and socket |
Configuration errors, actual listening port |
| Whether it is reachable externally | Connection from another host | Firewall, VPN, cloud-side traffic controls |
Inspect the journal for the current boot with journalctl -b -u 対象unit and check the reason for a startup failure or cancellation. Check dependencies with systemctl show 対象unit -p After -p Before -p Requires -p Wants.
If startup of the access VPN is canceled, investigate startup order as well as network configuration. For example, an old socket unit may wait for the VPN while the VPN waits for another startup stage, creating a dependency cycle. After checking the listeners and traffic that are actually in use, modify only units whose role has ended. With socket activation, it can be normal for a service that is waiting for connections to be inactive, so do not decide it is unnecessary based only on its status.
When cloud-init regenerates network configuration
cloud-init handles initial setup on cloud systems. If administrators are meant to maintain the existing Netplan configuration, check whether regeneration after an update changes it. To disable network configuration generation, write the following in an administrator-managed file under /etc/cloud/cloud.cfg.d/.
network:
  config: disabled
This disables only cloud-init network configuration generation. Do not apply it universally to environments that receive network settings from cloud metadata. Confirm who manages the configuration, then verify the backup and hash of the existing Netplan files, the generated result, and connectivity after a normal reboot.
8. Check authentication and startup compatibility only for relevant configurations
The following checks apply only to systems using the relevant software. There is no need to install any of these on a server where they are not already used.
If Samba provides Windows domain authentication
Samba AD/DC is a configuration that provides Windows domain authentication and directory services. When upgrading to Ubuntu 26.04, follow the official upgrade notes and check on the old OS whether samba-ad-dc is installed.
dpkg-query -W -f='${Status}\n' samba-ad-dc
apt-cache policy samba-ad-dc
Confirm install ok installed. If it is not installed, verify the official package source and planned additions first, then install it on the old OS. Do not combine the work of supplying a required package with recreating the domain or changing the functional level.
For backups, use an appropriate mode of samba-tool domain backup, not a simple copy of database files. During restore verification, check directory responses in an isolated environment in addition to the database. In testing with Samba 4.23, there were cases where startup failed because the internal socket path /run/samba/nmbd was missing, even after the DB and PID locations had been changed. Inspect persistent data separately from runtime directories to distinguish backup corruption from a missing part of the test environment.
If SSSD connects to an external authentication system
SSSD is a mechanism for connecting Linux to user information and authentication systems such as AD or LDAP. SSSD 2.10 removes config_file_version. If an old setting remains, preserve the original file’s owner and permissions before editing it, then check the result with sudo sssctl config-check.
Pay attention to the startup method as well. A responder started by SSSD’s monitor can conflict with the same responder started by a systemd socket. Responders are processes that handle user lookups, authentication, and related tasks. Compare the configuration documentation for the installed version with the logs, and adjust only the component that is in conflict.
After making changes, check user information retrieval, required authentication operations, and the domain’s Online status. For AD integration, also check adcli testjoin using the existing machine key. Before reissuing a key or rejoining the domain, rule out configuration and startup-method problems.
If an update is interrupted and packages or boot files are incomplete
First check for unconfigured packages and dependency issues with sudo dpkg --audit and sudo apt-get check. If another APT or dpkg operation is in progress, do not start another one. Do not force the issue by deleting lock files.
If you have confirmed that the process has finished and that package configuration needs to be resumed, run sudo dpkg --configure -a. Check the result before continuing. If source or dependency problems remain, resolve them first.
Even if a new kernel is installed, the system cannot boot normally if the required initrd is missing. Check the available space in /boot, the installed kernels, and the corresponding boot files. update-initramfs -c -k 対象バージョン creates a new initrd, while -u updates an existing one. The update-initramfs documentation
Choose the kernel to repair from the list of installed kernels. uname -r shows the currently running kernel, which may be the older version from before the update.
If normal startup is unavailable and you use a temporary root recovery shell, confirm that the procedure is authorized by an administrator because it bypasses authentication. Start with read-only checks and make only necessary changes. Undo temporary boot options or service-start suppression, and finish by verifying a normal systemd boot. Starting a service from the recovery shell alone does not verify that it starts automatically.
9. Compare the completion criteria after reboot
After the update, confirm that package configuration has completed before performing a normal reboot. After reboot, compare the pre-update record with the following items.
| Completion criterion | Evidence to check |
|---|---|
| Normal startup succeeded | Boot ID has changed; the system is not still in a recovery shell or emergency mode |
| Intended OS and kernel are running | /etc/os-release and uname -r; do not judge by the installed-kernel list alone |
| Packages are consistent | Results of dpkg --audit and apt-get check |
| Required services returned automatically | Services, sockets, containers, failed units, and external responses |
| Connectivity and authentication work | SSH, VPN, and required authentication paths from another host |
| Temporary changes have been cleaned up | Request handling, firewall, timers, holds, units, and configuration diffs |
| The updated state can be restored | Actual restore of a new backup generation and its verification |
Test operation not only from within the updated host, but also from another host that follows a path close to the one used in real operation. For an API, check that a normal request succeeds and that, on routes requiring authentication, an unauthenticated request is rejected as specified. An HTTP 200 response alone cannot verify the authentication boundary or the application’s main functions.
After restoring request handling, confirm that no temporary unit or firewall rule remains. For items covered by backups, save the completed state again and restore that new backup generation for verification. Do not use a successful pre-update restore as evidence for the post-update backup. If a backup was intentionally disabled, leave it in its original disabled state.
In the final work log, record what changed, command exit results, additional recovery actions, what was verified, and any remaining holds. If you did not test an actual user login or a key operation, leave it marked as unverified. Also record separately whether you could retrieve some backup data and whether you could restore the entire service in another environment.
Update workflow
From recovery preparation to post-update restore verification
Proceed to the next stage only after each stage's checks pass. If a check fails, record the state at that point and the actions already taken.
Restore testing and configuration backup
Retrieve the data you need and preserve the access path and pre-change configuration.
Control new requests and update
Recheck usage, stop services gracefully, and apply the planned updates.
Reboot and verify operation
Check external connectivity, automatic startup, restoration of the original configuration, and a new backup.